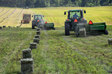
I know a lot of farmers are glad to see #Harvest19 come to an end. It sure has been a trying year for most. Our planting and harvest windows seem to shorten every year, and we need to be prepared when we hit the fields in 2020. So, this winter is a great time to get your machinery in the shop for some thorough maintenance.
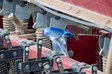
One of the most dreaded and feared pieces to work on is not the combine rotor concaves; it’s not even the kernel processer in your chopper. There are probably more cuss words and tools thrown at this item than any other essential mechanism on your farm. You guessed it . . . it’s your square baler knotters!
Knotters have not changed very much over the decades. The same Raaspe knotters have been around for years, and yet most people still find them very intimidating. For most of the world, there are two basic knotters: the Raaspe single knotter and the Raaspe double knotter. The single knotter is more commonly found on small square balers, both two- and three-tie units. The double knotter is found on today’s large square balers, as well as the bale baron square bale bundlers.
Though you can still find a few new units with single knotters, they are not on the newer high-density models seen here in the United States. Claas, however, did redesign the knotter used on its Quadrant large square balers and use their own designed single knotter across its line of large square balers.
The easiest way I know how to explain the difference between the two types of Raaspe knotters is really quite simple. The single knotter holds the twine in the twine disc or twine holder while baling. The double knotter does not have any twine in the knotter while building the bale. Rather, it ties one knot to finish off the bale it just completed, followed by a second knot to start the next bale in the chamber. Also, another dead giveaway is the sheer size of the knotter itself.
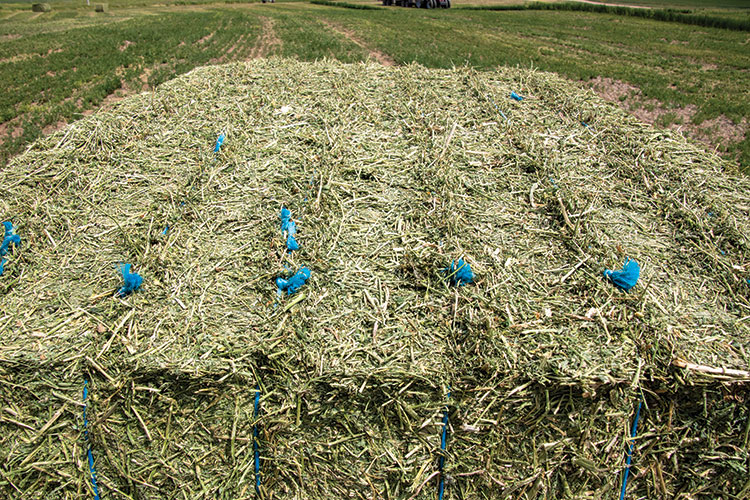
Small square balers use a knot strength twine ranging from 130 to 190 pound-force (lbf). The double knotters can handle a wider range from 350 up to 700 lbf knot strength on the high-density balers. Thus, the size to hold this rope that we now use as twine needs to be quite a bit larger.
Keep knives sharp
Let’s go over a few things you can check on your knotter while in the shop and look at a few common reasons for missed ties that you may see in the field. Probably one of the most common problems is simply with the twine knife. This part makes a lot of cuts through tough twine, and I recommend that you replace these yearly as the knives are cheap and easier to replace while in the shop rather than in a dust bowl during 90-degree heat.
One of the next most common items to cause a bird’s nest in your knotter is the billhook. This bird’s nest can look like a bluebird dream home if not detected in time. The billhook spins and is what ties the knot in the twine. It gets its name for the way it looks like a duck bill and it has a hook on it. The hook commonly does not open and doesn’t allow the twine to slide off the bill. The roller on the end of the hook can get damaged or break, causing the hook not to release.
The knotter has springs that adjust the tension on the bill hook, forcing the knot to tighten faster or slower. If the spring tension is too strong, the knot will hang up on the bill hook. If too loose, there will not be a knot at all. This setting is critical, and you can look at the knot tail to help gauge if the setting is correct. The tail should be around 3/4 inch in length with a clean, even cut.
Spring to action
The twine retainer or twine disc is another vital piece to this process. It actually holds the twine while a small square baler is building the bale, or in the case of the large square baler, it holds the twine in between the first and second knots. The twine retainers determine how long the tails are on the knots. If you notice on your large square baler that one end of the twine has a knot, but the other end does not, then the twine disc did not hold it properly. The tension can be adjusted by a bolt which moves the twine holder spring or springs, and in this case, the tension was too low.
Both of these springs do not require big adjustments; something like 1/8 of a turn is plenty. Both the spring tensions on the billhook and twine retainer are critical parts to tying the knot, but first we must make sure the twine makes it to the right place in the knotter. Here, I’m talking about the needles that bring the twine up through the bale chamber when it’s time to tie off a bale.
Each baler manufacturer will have a different measurement to center the needle and for how far the needle penetrates through the knotters. You should refer to your operator’s manual for these measurements and both should be checked on an annual basis. These are simple to adjust by tightening or loosening the bolts holding the needles to the yoke.
This was a quick overview into a very intimidating part on your most essential haymaking tool, but if you can make these adjustments each year, they can save a lot of sweat and tears the next summer. A blower and a little grease never hurt any knotter either. Be sure to check with the local knotter expert at your dealership, and they can help you identify what is the root cause of the missed ties. Most of the time there is an obvious reason rather than one hiding in the bird’s nest.
This article appeared in the January 2020 issue of Hay & Forage Grower on page 23.
Not a subscriber? Click to get the print magazine.